Polymorphism is a concept where objects of different types are accessible via the same interface. In this post I talk about the third of the OOP Pillars – Polymorphism in C#. Please see my previous posts for the other OOP Pillars Inheritance and Encapsulation.
Overview
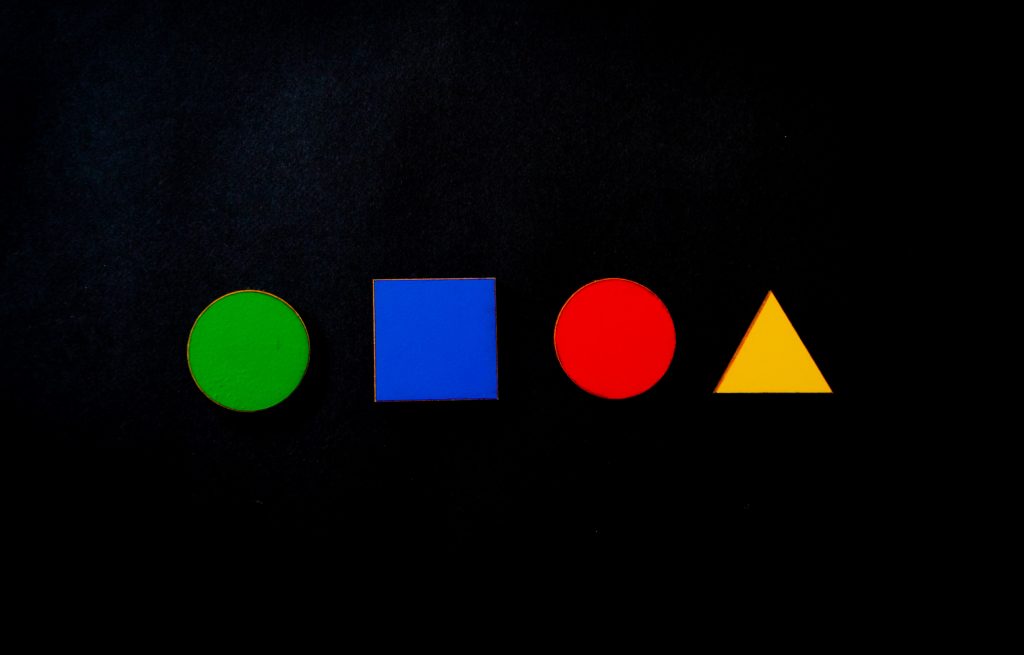
Polymosphism comes from the words Poly meaning many and Morph meaning shapes. The classic example of this concept, in software development is to describe a Shape. A shape can take many forms, for example a circle, square, triangle, rectangle, and the list goes on. All shapes share common attributes, for example all shapes have an area, but the way to calculate the area can vary for different shapes.
In Polymorhpysism, base classes can define and implement Virtual methods. Derived classes can override them to provide their own implementation. In the scenario of the Area calculation for different shapes, the base Shape class can implement a Virtual method to calculate the area of a rectangle as the default. Any objects that derive from Shape and is not a rectangle overrides the Shape method to provide the implementation that is appropriate to its shape.
Virtual Methods
When a hierarchy of objects is created, any derived class gains the methods, fields, properties and events of the base classes. A derived class can override any base methods marked Virtual. Let’s look at an example.
The class shape below defines a Draw() and Shape() method as virtual.
public class Shape
{
    public int X { get; set; }
    public int Y { get; set; }
    public int Height { get; set; }
    public int Width { get; set; }

    public virtual double Area()
    {
        return Height * Width;
    }

    public virtual void Draw()
    {
        Console.WriteLine("Drawing the base Shape.");
    }
}

public class Square : Shape
{
    public override void Draw()
    {
        Console.WriteLine("Drawing a Square.");
    }
}

public class Circle : Shape
{
    public int Radius { get; set; }

    public override void Draw()
    {
        Console.WriteLine("Drawing a Circle");
    }

    public override double Area()
    {
        return  Math.PI * Math.Pow(Radius, 2);
    }
}
In the example above, the Square shape uses overrides the Draw method. The Circle overrides the Draw and Area methods.
Hiding Base Members
A concept also known as Shadowing, is when the derived class declares a member of the same name as the base class using the New keyword. This causes the base implementation to become hidden or, in other words, the base method inaccessible from an instance of the derives class.
It is possible to access the base method by casting the instance to a base type. Therefore it is not completely inaccessible.
public class Circle : Shape
{
public int Radius { get; set; }
public new int Height => 0;
public new int Width => 0;
public override void Draw()
{
Console.WriteLine("Drawing a Circle");
}
public override double Area()
{
return Math.PI * Math.Pow(Radius, 2);
}
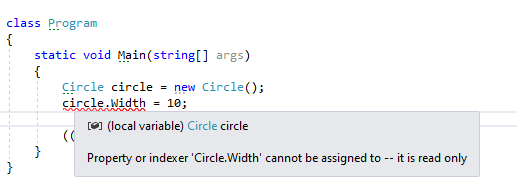
}If you attempt to assign a value to a circle’s Height or Width properties, you will get an error (shown below). This is because the Circle class defines a new, read-only version of the Width property.
Sealing Methods to Prevent Overriding
Virtual methods can be marked as Sealed, at any point of the inheritance chain, to prevent further overriding. This works the same as Sealing classes.
Once sealed, a method can no longer be overridden. However, a deriving class can declare a new version of the sealed method. In other words, if a class inherits a base class containing a sealed method called Draw(), it is not able to override Draw(), but it can create a new implementation of Draw() using the new keyword.
public class Square : Shape
{
    public sealed override void Draw()
    {
        Console.WriteLine("Drawing a Square.");
    }
}

public class Rectangle : Square
{
    public new void Draw()
    {
        Console.WriteLine("Drawing a rectangle.");
    }
}
Accessing Virtual Members of the Base Class
When using the instance of a class which overrides a method in a base class, it will call the version of the method in the current instance. It is possible to access the method of the base class as well.
To do this, within the deriving class definition, qualify the method with the word Base. For example, a method called Draw() would be called as base.Draw(). Therefore it will execute the method defined by the base class.
This technique is often used in constructors, when a deriving class calls the base class constructor.
I hope you enjoyed my brief introduction into OOP. Please see Microsoft’s documentation on Polymorphism or OOP for a more in-depth look into these topics.